Lesson 3: Events
The web is a dynamic environment where a lot of things happen. Most appropriately, they're called events. Some of these events, like a user clicking a button or moving the mouse over a link, are of great interest to a JavaScript coder.

By the end of this lesson you will know:
- what events are;
- what JavaScript can do with events and how.
What are events?
Events are occurrences taking place in the context of the interactions between web server, web browser, and web user.
For instance, if you're on a web page and click on a link, there are at least 3 important events being triggered:
- onClick event: triggered by you as you click the link;
- onUnload event: triggered by the web browser as it leaves the current web page;
- onLoad event: triggered by the browser as the new web page content is loaded.
Which events should I focus on from a JavaScript point of view?
It all depends on the JavaScript program you're writing, that is, on the objectives you want to achieve with your script.
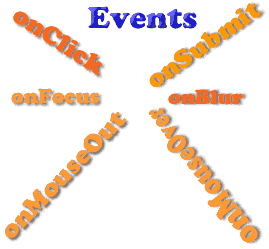
However, the most common events you're likely to deal with in your JavaScript are:
- onLoad/onUnload;
- onClick;
- onSubmit (triggered by the user submitting a form);
- onFocus / onBlur (triggered by a user as, for example, she clicks in a textbox or clicks away from a textbox respectively);
- onMouseOver / onMouseOut (triggered by the user moving the mouse over or away from an HTML element respectively).
There are other events that might eventually be of interest to you as you write sophisticated JavaScript scripts, such as scroll events (as users scroll up and down a web page), onTextChanged events (as users type in a textbox or textarea), even touch events, which are likely to gain interest in today's mobile and tablet-invaded world.
However, for the purposes of this tutorial, you're mostly going to come across the core events listed above.
What do I do with events from a JavaScript point of view?
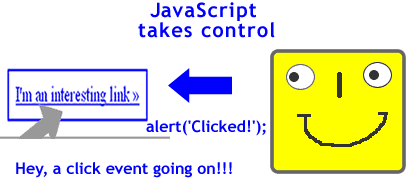
As you write a JavaScript program, events become interesting because they give your script a hook for gaining control on what happens in the web page.
Once your script gets hold of the hook provided by the event, your script is boss. The jargon for this is event-driven programming: an event happens and JavaScript handles it, for instance by displaying an alert box with a message for the user.

Hey, an onClick event going on!
Conclusion: events bend to JavaScript commands by means of event handlers. These are statements in your JavaScript script that are appropriately attached to those events.
How does JavaScript handle events?
In this tutorial you've already hooked an event handler to an event. More precisely, you attached the alert() command to the onLoad event.
The alert() command is a command which is part of the JavaScript language. The JavaScript interpreter in the browser translates it along these lines:
"Hey, browser, display an alert box that contains the message typed within the () enclosing brackets"
(Notice: JavaScript is case sensitive. If you write Alert instead of alert, your script won't work!).
As you saw in the previous lesson, simply by writing a JavaScript statement between <script> ... </script> tags achieves the execution of that statement as the onLoad event fires up.
However, your JavaScript scripts are capable of doing more interesting stuff when they handle events in response to user actions, for example an onClick event. How do we do that?
Try out: handle an onClick event with JavaScript
The browser already has its own ways of handling events. For instance, when a page has loaded, the browser fires the onLoad event and displays the page contents; when a user clicks a link, the browser communicates to the server to access the requested page, etc. These are called default actions.
The fun of being in charge, though, is not to let the browser do what it likes, but of letting JavaScript do its job and decide what's to be done.
The simplest way to attach an event handler to an event is to insert the required JavaScript code within the HTML element that produces the event. Let's have a go by simply preventing the browser default action as the user clicks a link on the page. Fire off your text editor and let's get coding!
Prepare a new basic HTML document displaying a simple link like the one shown below:
	  <!DOCTYPE html>
	  <html>
	  <head>
	  <title>Lesson 3: Events and Event Handlers</title>
	  </head>
	  <body>
	  <h1>Lesson 3: Events and Event Handlers</h1>

	  <a href="http://html.net">Click Me!</a>

	  </body>
	  </html>
Run the page in the browser. If you click on the link now, you'll be landing straight to the HTML.net website. This is the browser default action, as explained above.
Now go back to your HTML document and type the following JavaScript command within the <a> tag, as follows:
	  <!DOCTYPE html>
	  <html>
	  <head>
	  <title>Lesson 3: Events and Event Handlers</title>
	  </head>
	  <body>
	  <h1>Lesson 3: Events and Event Handlers</h1>

	  <a href="http://html.net" onclick="alert('Going anywhere? Not so fast!'); return false;">Click Me!</a>

	  </body>
	  </html>
Go ahead, run the page in the browser, and ... you're stuck! JavaScript is in control!
What's just happened there?
That's how easy it was to take control of a link with JavaScript! All you did was to insert a couple of JavaScript statements to the onclick attribute of the HTML <a> tag.
You already know about the good old alert() command, so I'll skip over it. The return false; command tells the JavaScript interpreter to return a value, in this case the value equals false, which prevents the browser from performing its default action. You'll be using this little command quite often in your JavaScript programming life.
You handle the other events listed above in the same way: just insert the JavaScript command as the value of the onfocus, onblur, onmouseover, onmouseout and onsubmit attributes of an HTML element.
Summary
That'll be all for this lesson. You learned what events are, why events are important in JavaScript programming, and how to use event handlers to let JavaScript be in control of your web page behavior.
But this is just a tiny taste of what JavaScript can do once it's in charge. Follow on to find out.
Get ready for the major topic of lesson 4: variables and constants.
| Related topics in the | Replies | Views |
|---|---|---|
| No related topics yet | ||
